Nova actions allow you to perform custom tasks on one or more Eloquent models. For example, you might write an action that sends an email to a user containing account data they have requested. Or, you might write an action to transfer a group of records to another user.
Once an action has been attached to a resource definition, you may initiate it from the resource’s index or detail pages:
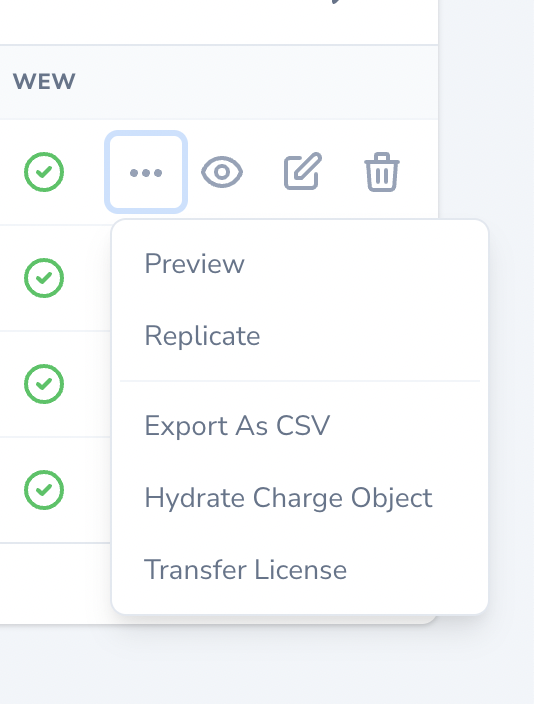
If an action is enabled for display on the resource’s table row, you may also initiate the action from the resource’s action dropdown menu via the resource index page. These actions are referred to as “Inline Actions”:
Overview
Nova actions may be generated using the nova:action Artisan command. By default, all actions are placed in the app/Nova/Actions directory:
php artisan nova:action EmailAccountProfile
--destructive option:
php artisan nova:action DeleteUserData --destructive
<?php

namespace App\Nova\Actions;

use App\Models\AccountData;
use Illuminate\Bus\Queueable;
use Illuminate\Contracts\Queue\ShouldQueue;
use Illuminate\Queue\InteractsWithQueue;
use Illuminate\Support\Collection;
use Laravel\Nova\Actions\Action;
use Laravel\Nova\Http\Requests\NovaRequest;
use Laravel\Nova\Fields\ActionFields;

class EmailAccountProfile extends Action
{
    use InteractsWithQueue, Queueable;

    /**
    * Perform the action on the given models.
    *
    * @param  \Laravel\Nova\Fields\ActionFields  $fields
    * @param  \Illuminate\Support\Collection  $models
    * @return mixed
    */
    public function handle(ActionFields $fields, Collection $models)
    {
        foreach ($models as $model) {
            (new AccountData($model))->send();
        }
    }

    /**
    * Get the fields available on the action.
    *
    * @param  \Laravel\Nova\Http\Requests\NovaRequest  $request
    * @return array
    */
    public function fields(NovaRequest $request)
    {
        return [];
    }
}
handle method. The handle method receives the values for any fields attached to the action, as well as a collection of selected models. The handle method always receives a Collection of models, even if the action is only being performed against a single model.
Within the handle method, you may perform whatever tasks are necessary to complete the action. You are free to update database records, send emails, call other services, etc. The sky is the limit!
Action Titles
Typically, Nova utilizes the action’s class name to determine the displayable name of the action that should be shown in the action selection menu. If you would like to change the displayable name of the action, you may define a name property on the action class:
/**
 * The displayable name of the action.
 *
 * @var string
 */
public $name = 'Action Title';
Destructive Actions
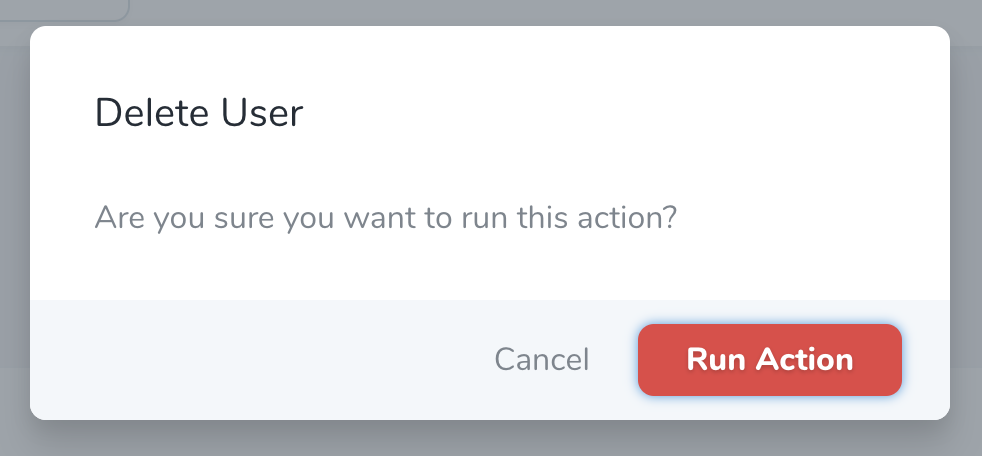
You may designate an action as destructive or dangerous by defining an action class that extends Laravel\Nova\Actions\DestructiveAction. This will change the color of the action’s confirm button to red:
When a destructive action is added to a resource that has an associated authorization policy, the policy’s delete method must return true in order for the action to run.
Action Callbacks
The Action::then method should not be utilized if your action is queued. To achieve similar functionality when using queued actions, you should leverage Nova’s action batching callbacks. then method when registering your action.
The then methods accepts a closure which will be invoked when the action has finished executing against all of the selected resources. The closure will receive a flattened Laravel collection containing the values that were returned by the action.
For example, note that the following action’s handle method returns the $models it receives:
public function handle(ActionFields $fields, Collection $models)
{
    foreach ($models as $model) {
        (new AccountData($model))->send();
    }

    return $models;
}
then callback to access the returned models and interact with them after the action has finished executing:
public function actions(NovaRequest $request)
{
    return [
        (new Actions\EmailAccountProfile)->then(function ($models) {
            $models->each(function ($model) {
                //
            });
        }),
    ];
}
Action Fields
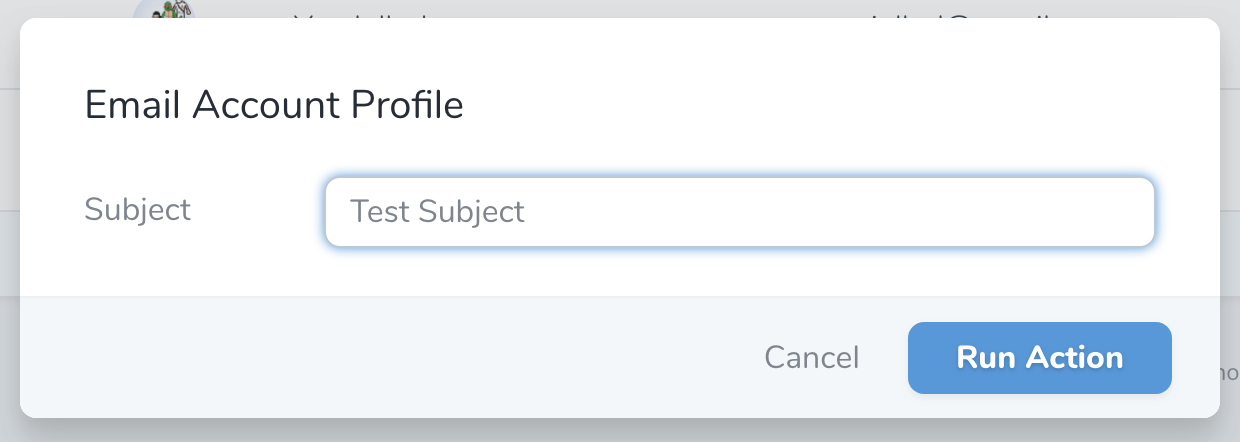
Sometimes you may wish to gather additional information from the user before dispatching an action. For this reason, Nova allows you to attach most of Nova’s supported fields directly to an action. When the action is initiated, Nova will prompt the user to provide input for the fields:
To add a field to an action, add the field to the array of fields returned by the action’s fields method:
use Laravel\Nova\Fields\Text;

/**
 * Get the fields available on the action.
 *
 * @param  \Laravel\Nova\Http\Requests\NovaRequest  $request
 * @return array
 */
public function fields(NovaRequest $request)
{
    return [
        Text::make('Subject'),
    ];
}
handle method, you may access your fields using dynamic accessors on the provided ActionFields instance:
/**
 * Perform the action on the given models.
 *
 * @param  \Laravel\Nova\Fields\ActionFields  $fields
 * @param  \Illuminate\Support\Collection  $models
 * @return mixed
 */
public function handle(ActionFields $fields, Collection $models)
{
    foreach ($models as $model) {
        (new AccountData($model))->send($fields->subject);
    }
}
Action Fields Default Values
You may use the default method to set the default value for an action field:
Text::make('Subject')->default(function ($request) {
    return 'Test: Subject';
}),
Action Responses
Typically, when an action is executed, a generic “success” messages is displayed in the Nova UI. However, you are free to customize this response using a variety of methods available via the ActionResponse class. To display a custom “success” message, you may invoke the ActionResponse::message method from your handle method:
use Laravel\Nova\Actions\ActionResponse;

/**
 * Perform the action on the given models.
 *
 * @param  \Laravel\Nova\Fields\ActionFields  $fields
 * @param  \Illuminate\Support\Collection  $models
 * @return mixed
 */
public function handle(ActionFields $fields, Collection $models)
{
    // ...

    return ActionResponse::message('It worked!');
}
ActionResponse::danger method:
use Laravel\Nova\Actions\ActionResponse;

return ActionResponse::danger('Something went wrong!');
Messages passed to ActionResponse are not escaped before rendering. If you are providing untrusted user data to ActionResponse, ensure that you escape it using the e function.
Redirect Responses
To redirect the user to an entirely new location after the action is executed, you may use the ActionResponse::redirect method:
use Laravel\Nova\Actions\ActionResponse;

return ActionResponse::redirect('https://example.com');
ActionResponse::visit method:
use Laravel\Nova\Actions\ActionResponse;

return ActionResponse::visit('/resources/posts/new', [
    'viaResource' => 'users',
    'viaResourceId' => 1,
    'viaRelationship' => 'posts'
]);
ActionResponse::openInNewTab method:
use Laravel\Nova\Actions\ActionResponse;

return ActionResponse::openInNewTab('https://example.com');
Download Responses
To initiate a file download after the action is executed, you may use the ActionResponse::download method. The download method accepts the desired name of the file as its first argument, and the URL of the file to be downloaded as its second argument:
use Laravel\Nova\Actions\ActionResponse;

return ActionResponse::download('Invoice.pdf', 'https://example.com/invoice.pdf');
Custom Modal Responses
In addition to the customization options provided before and during an action’s execution, Nova also supports the ability to present a custom modal response to the user. This allows you to provide additional context or follow-up actions to the user, customized to your use-case.
For example, let’s imagine you have defined an action named GenerateApiToken, which creates unique tokens for use with a REST API. Using a custom action response modal, you could show the user running the action a modal allowing them to copy the newly-generated API token to their clipboard.
Using the nova:asset Artisan command, you may generate a custom asset and register the custom modal with Nova’s Vue instance:
import ApiTokenCopier from "./components/ApiTokenCopier";

Nova.booting(app => {
  app.component("api-token-copier", ApiTokenCopier);
});
modal method within your action’s handle method, which will instruct Nova to show the modal after running the action, passing the Vue component’s name and any additional data you specify to the component. The data will be made available to the custom modal’s Vue component as props:
public function handle(ActionFields $fields, Collection $models)
{
    if ($models->count() > 1) {
        return Action::danger('Please run this on only one user resource.');
    }

    $models->first()->update(['api_token' => $token = Str::random(32)]);

    return Action::modal('api-token-copier', [
        'message' => 'The API token was generated!',
        'token' => $token,
    ]);
}
Queued Actions
Occasionally, you may have actions that take a while to finish running. For this reason, Nova makes it a cinch to queue your actions. To instruct Nova to queue an action instead of running it synchronously, mark the action with the ShouldQueue interface:
<?php

namespace App\Nova\Actions;

use App\Models\AccountData;
use Illuminate\Bus\Queueable;
use Illuminate\Contracts\Queue\ShouldQueue;
use Illuminate\Queue\InteractsWithQueue;
use Illuminate\Support\Collection;
use Laravel\Nova\Actions\Action;
use Laravel\Nova\Contracts\BatchableAction;
use Laravel\Nova\Fields\ActionFields;

class EmailAccountProfile extends Action implements ShouldQueue
{
    use InteractsWithQueue, Queueable;

    // ...
}
--queued option when executing the nova:action Artisan command:
php artisan nova:action EmailAccountProfile --queued
At this time, Nova does not support attaching File fields to a queued action. If you need to attach a File field to an action, the action must be run synchronously.
Customizing the Connection and Queue
You may customize the queue connection and queue name that the action is queued on by setting the $connection and $queue properties within the action’s constructor:
/**
 * Create a new action instance.
 *
 * @return void
 */
public function __construct()
{
    $this->connection = 'redis';
    $this->queue = 'emails';
}
Job Batching
You may also instruct Nova to queue actions as a batch by marking the action with the Laravel\Nova\Contracts\BatchableAction interface. In addition, the action should use the Illuminate\Bus\Batchable trait.
When an action is batchable, you should define a withBatch method that will be responsible for configuring the action’s batch callbacks. This allows you to define code that should run after an entire batch of actions finishes executing against multiple selected resources. In fact, you can even access the model IDs for all of the resources that were selected when the batched action was executed:
<?php

namespace App\Nova\Actions;

use App\Models\AccountData;
use Illuminate\Bus\Batch;
use Illuminate\Bus\Batchable;
use Illuminate\Bus\PendingBatch;
use Illuminate\Bus\Queueable;
use Illuminate\Contracts\Queue\ShouldQueue;
use Illuminate\Queue\InteractsWithQueue;
use Illuminate\Support\Collection;
use Laravel\Nova\Actions\Action;
use Laravel\Nova\Contracts\BatchableAction;
use Laravel\Nova\Fields\ActionFields;
use Throwable;

class EmailAccountProfile extends Action implements BatchableAction, ShouldQueue
{
    use Batchable, InteractsWithQueue, Queueable;

    /**
     * Prepare the given batch for execution.
     *
     * @param  \Laravel\Nova\Fields\ActionFields  $fields
     * @param  \Illuminate\Bus\PendingBatch  $batch
     * @return void
     */
    public function withBatch(ActionFields $fields, PendingBatch $batch)
    {
        $batch->then(function (Batch $batch) {
            // All jobs completed successfully...

            $selectedModels = $batch->resourceIds;
        })->catch(function (Batch $batch, Throwable $e) {
            // First batch job failure detected...
        })->finally(function (Batch $batch) {
            // The batch has finished executing...
        });
    }
}
Action Log
It is often useful to view a log of the actions that have been run against a particular resource. Additionally, when queueing actions, it’s often important to know when the queued actions have actually finished executing. Thankfully, Nova makes it a breeze to add an action log to a resource by attaching the Laravel\Nova\Actions\Actionable trait to the resource’s corresponding Eloquent model.
For example, we may attach the Laravel\Nova\Actions\Actionable trait to the User Eloquent model:
<?php

namespace App;

use Laravel\Nova\Actions\Actionable;
use Illuminate\Notifications\Notifiable;
use Illuminate\Foundation\Auth\User as Authenticatable;

class User extends Authenticatable
{
    use Actionable, Notifiable;

    // ...
}
Disabling the Action Log
If you do not want to record an action in the action log, you may disable this behavior by adding a withoutActionEvents property on your action class:
/**
 * Disables action log events for this action.
 *
 * @var bool
 */
public $withoutActionEvents = true;
withoutActionEvents method, you may disable the action log for an action when the action is attached to a resource. Disabling the action log is often particularly helpful when an action is often executed against thousands of resources at once, since it allows you to avoid thousands of slow, sequential action log database inserts:
/**
 * Get the actions available for the resource.
 *
 * @param  \Laravel\Nova\Http\Requests\NovaRequest  $request
 * @return array
 */
public function actions(NovaRequest $request)
{
    return [
        (new SomeAction)->withoutActionEvents()
    ];
}
Queued Action Statuses
While a queued action is running, you may update the action’s “status” for any of the models that were passed to the action via its model collection. For example, you may use the action’s markAsFinished method to indicate that the action has completed processing a particular model:
/**
 * Perform the action on the given models.
 *
 * @param  \Laravel\Nova\Fields\ActionFields  $fields
 * @param  \Illuminate\Support\Collection  $models
 * @return mixed
 */
public function handle(ActionFields $fields, Collection $models)
{
    foreach ($models as $model) {
        (new AccountData($model))->send($fields->subject);

        $this->markAsFinished($model);
    }
}
markAsFailed method:
/**
 * Perform the action on the given models.
 *
 * @param  \Laravel\Nova\Fields\ActionFields  $fields
 * @param  \Illuminate\Support\Collection  $models
 * @return mixed
 */
public function handle(ActionFields $fields, Collection $models)
{
    foreach ($models as $model) {
        try {
            (new AccountData($model))->send($fields->subject);
        } catch (Exception $e) {
            $this->markAsFailed($model, $e);
        }
    }
}
Action Modal Customization
By default, actions will ask the user for confirmation before running. You can customize the confirmation message, confirm button, and cancel button to give the user more context before running the action. This is done by calling the confirmText, confirmButtonText, and cancelButtonText methods when defining the action:
/**
 * Get the actions available for the resource.
 *
 * @param  \Laravel\Nova\Http\Requests\NovaRequest  $request
 * @return array
 */
public function actions(NovaRequest $request)
{
    return [
        (new Actions\ActivateUser)
            ->confirmText('Are you sure you want to activate this user?')
            ->confirmButtonText('Activate')
            ->cancelButtonText("Don't activate"),
    ];
}


