> ## Documentation Index
> Fetch the complete documentation index at: https://nova.laravel.com/docs/llms.txt
> Use this file to discover all available pages before exploring further.
# The Basics
> Learn how to define, register, and customize Nova resources.
## Introduction
Laravel Nova is a beautiful administration dashboard for Laravel applications. Of course, the primary feature of Nova is the ability to administer your underlying database records using Eloquent. Nova accomplishes this by allowing you to define a Nova "resource" that corresponds to each Eloquent model in your application.
## Defining Resources
By default, Nova resources are stored in the `app/Nova` directory of your application. You may generate a new resource using the `nova:resource` Artisan command:
```bash theme={null}
php artisan nova:resource Post
```
The most basic and fundamental property of a resource is its `model` property. This property tells Nova which Eloquent model the resource corresponds to:
```php theme={null}
/**
* The model the resource corresponds to.
*
* @var string
*/
public static $model = 'App\Models\Post';
```
Freshly created Nova resources only contain an `ID` field definition. Don't worry, we'll add more fields to our resource soon.
Nova contains a few reserved words which may not be used for resource names:
* Card
* Dashboard
* Field
* Impersonate
* Metric
* Resource
* Search
* Script
* Style
* Tool
## Registering Resources
By default, all resources within the `app/Nova` directory will automatically be registered with Nova. You are not required to manually register them.
Before resources are available within your Nova dashboard, they must first be registered with Nova. Resources are typically registered in your application's `app/Providers/NovaServiceProvider.php` file. This file contains various configuration and bootstrapping code related to your Nova installation.
**As mentioned above, you are not required to manually register your resources; however, if you choose to do so, you may do so by overriding the `resources` method of your `NovaServiceProvider`**.
There are two approaches to manually registering resources. You may use the `resourcesIn` method to instruct Nova to register all Nova resources within a given directory. Alternatively, you may use the `resources` method to manually register individual resources:
```php theme={null}
use App\Nova\User;
use App\Nova\Post;
/**
* Register the application's Nova resources.
*
* @return void
*/
protected function resources()
{
Nova::resourcesIn(app_path('Nova'));
Nova::resources([
User::class,
Post::class,
]);
}
```
Once your resources are registered with Nova, they will be available in the Nova sidebar:
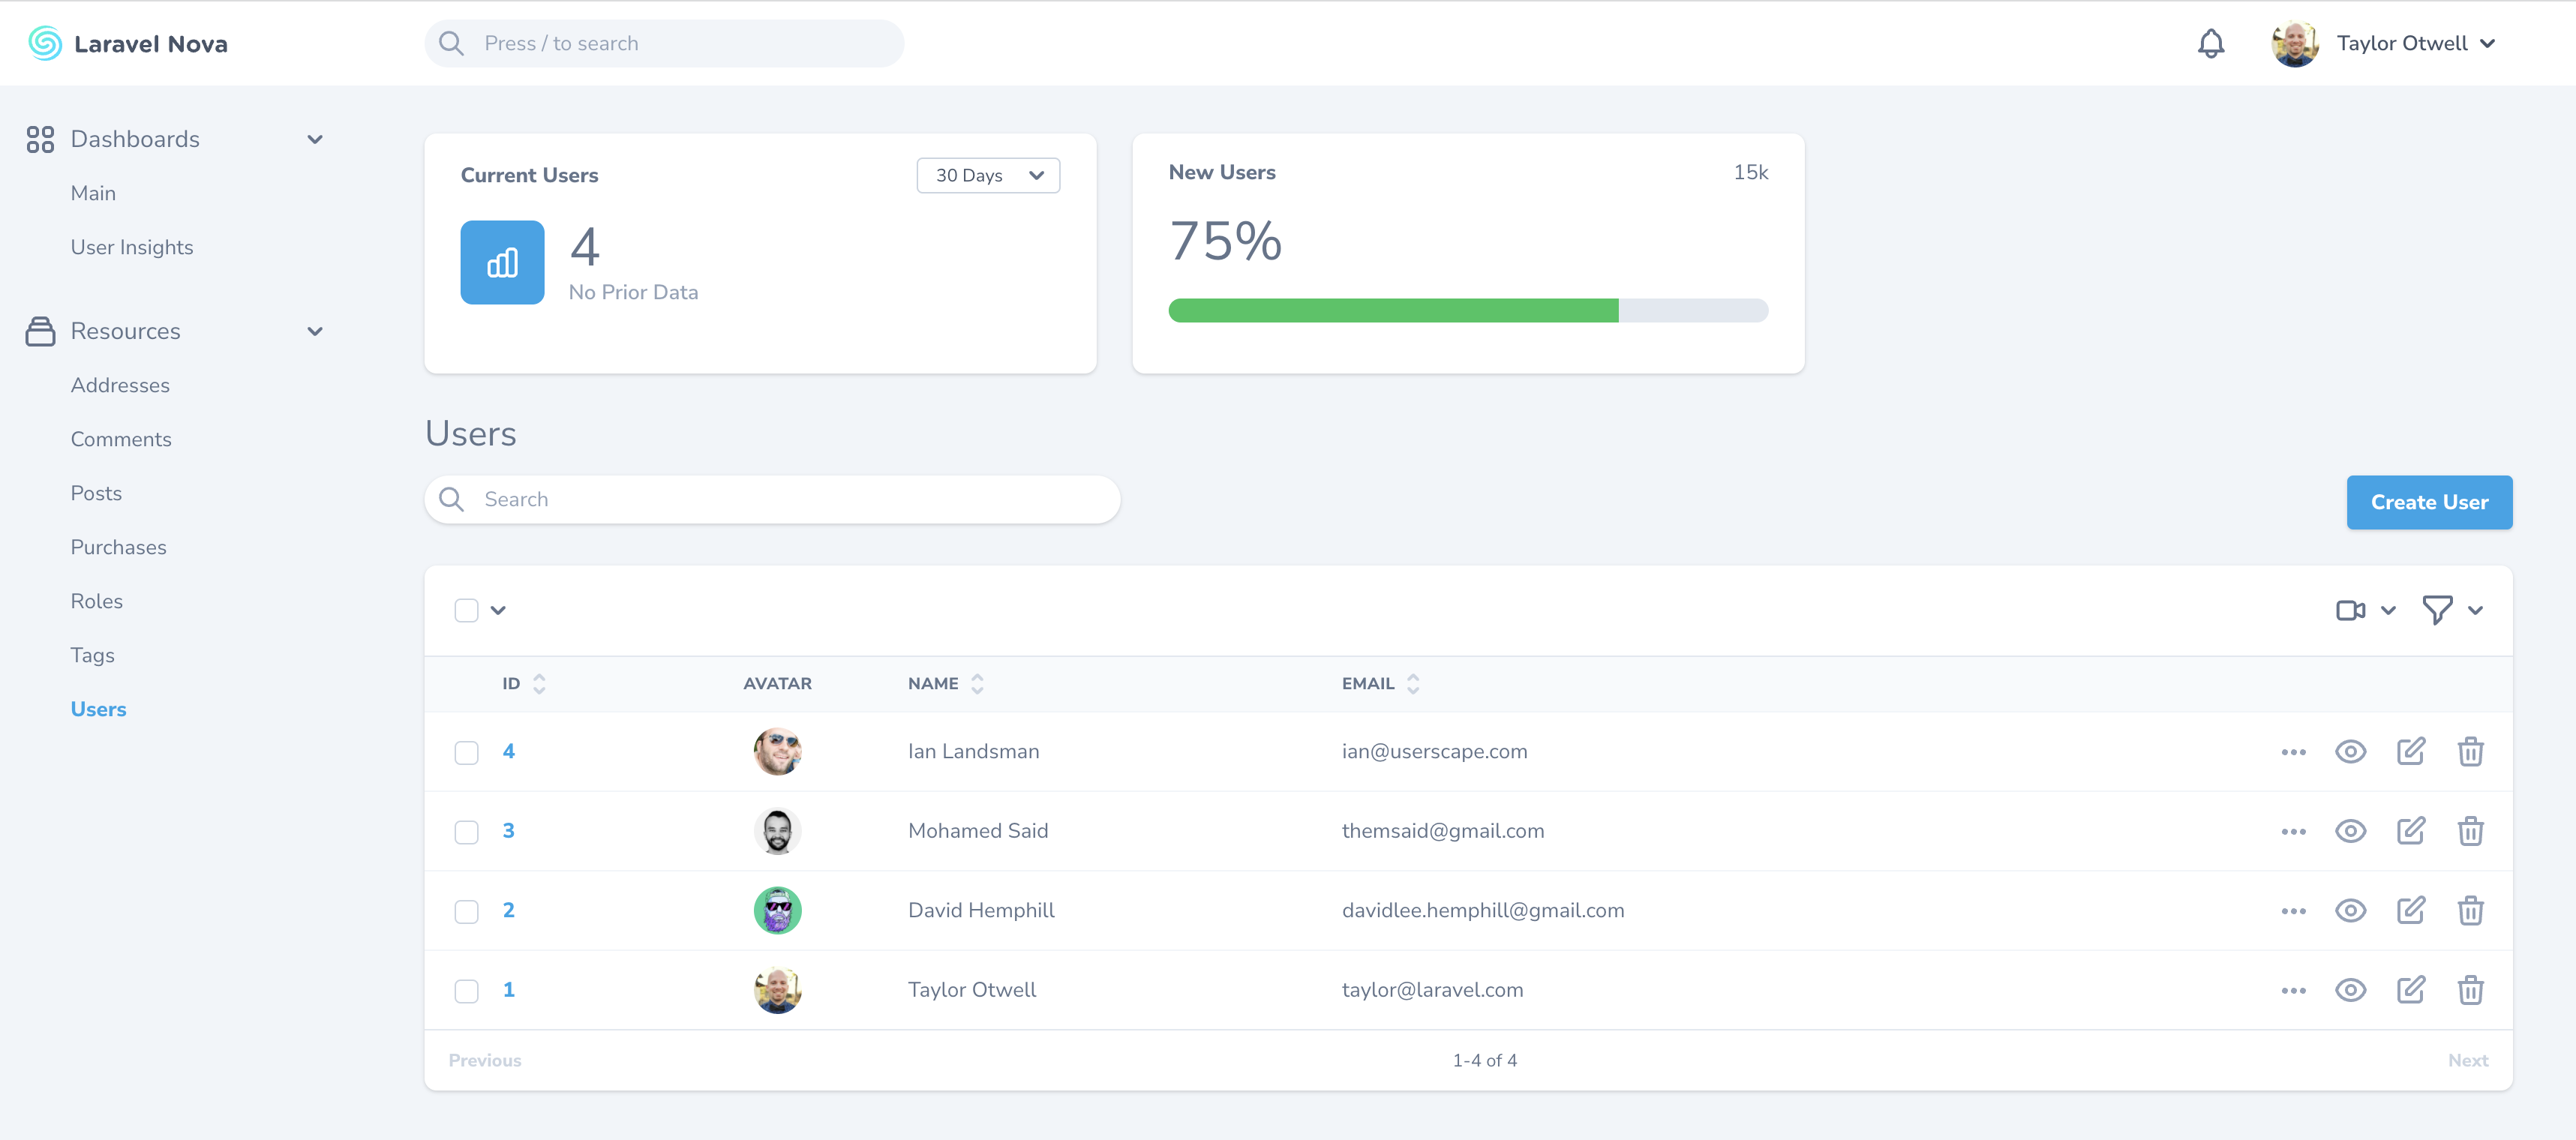 If you do not want a resource to appear in the sidebar, you may override the `displayInNavigation` property of your resource class:
```php theme={null}
/**
* Indicates if the resource should be displayed in the sidebar.
*
* @var bool
*/
public static $displayInNavigation = false;
```
#### Customizing Resource Menus
You can customize the resource's menu by defining a `menu` method on your resource class:
```php theme={null}
use Illuminate\Http\Request;
/**
* Get the menu that should represent the resource.
*
* @param \Illuminate\Http\Request $request
* @return \Laravel\Nova\Menu\MenuItem
*/
public function menu(Request $request)
{
return parent::menu($request)->withBadge(function () {
return static::$model::count();
});
}
```
Please refer to the documentation on [menu customization](./../customization/menus) for more information.
## Grouping Resources
If you would like to separate resources into different sidebar groups, you may override the `group` property of your resource class:
```php theme={null}
/**
* The logical group associated with the resource.
*
* @var string
*/
public static $group = 'Admin';
```
## Resource Table Style Customization
Nova supports a few visual customization options for your resources.
### Table Styles
Sometimes it's convenient to show more data on your resource index tables. To accomplish this, you can use the "tight" table style option designed to increase the visual density of your table rows. To accomplish this, override the static `$tableStyle` property or the static `tableStyle` method on your resource class:
```php theme={null}
/**
* The visual style used for the table. Available options are 'tight' and 'default'.
*
* @var string
*/
public static $tableStyle = 'tight';
```
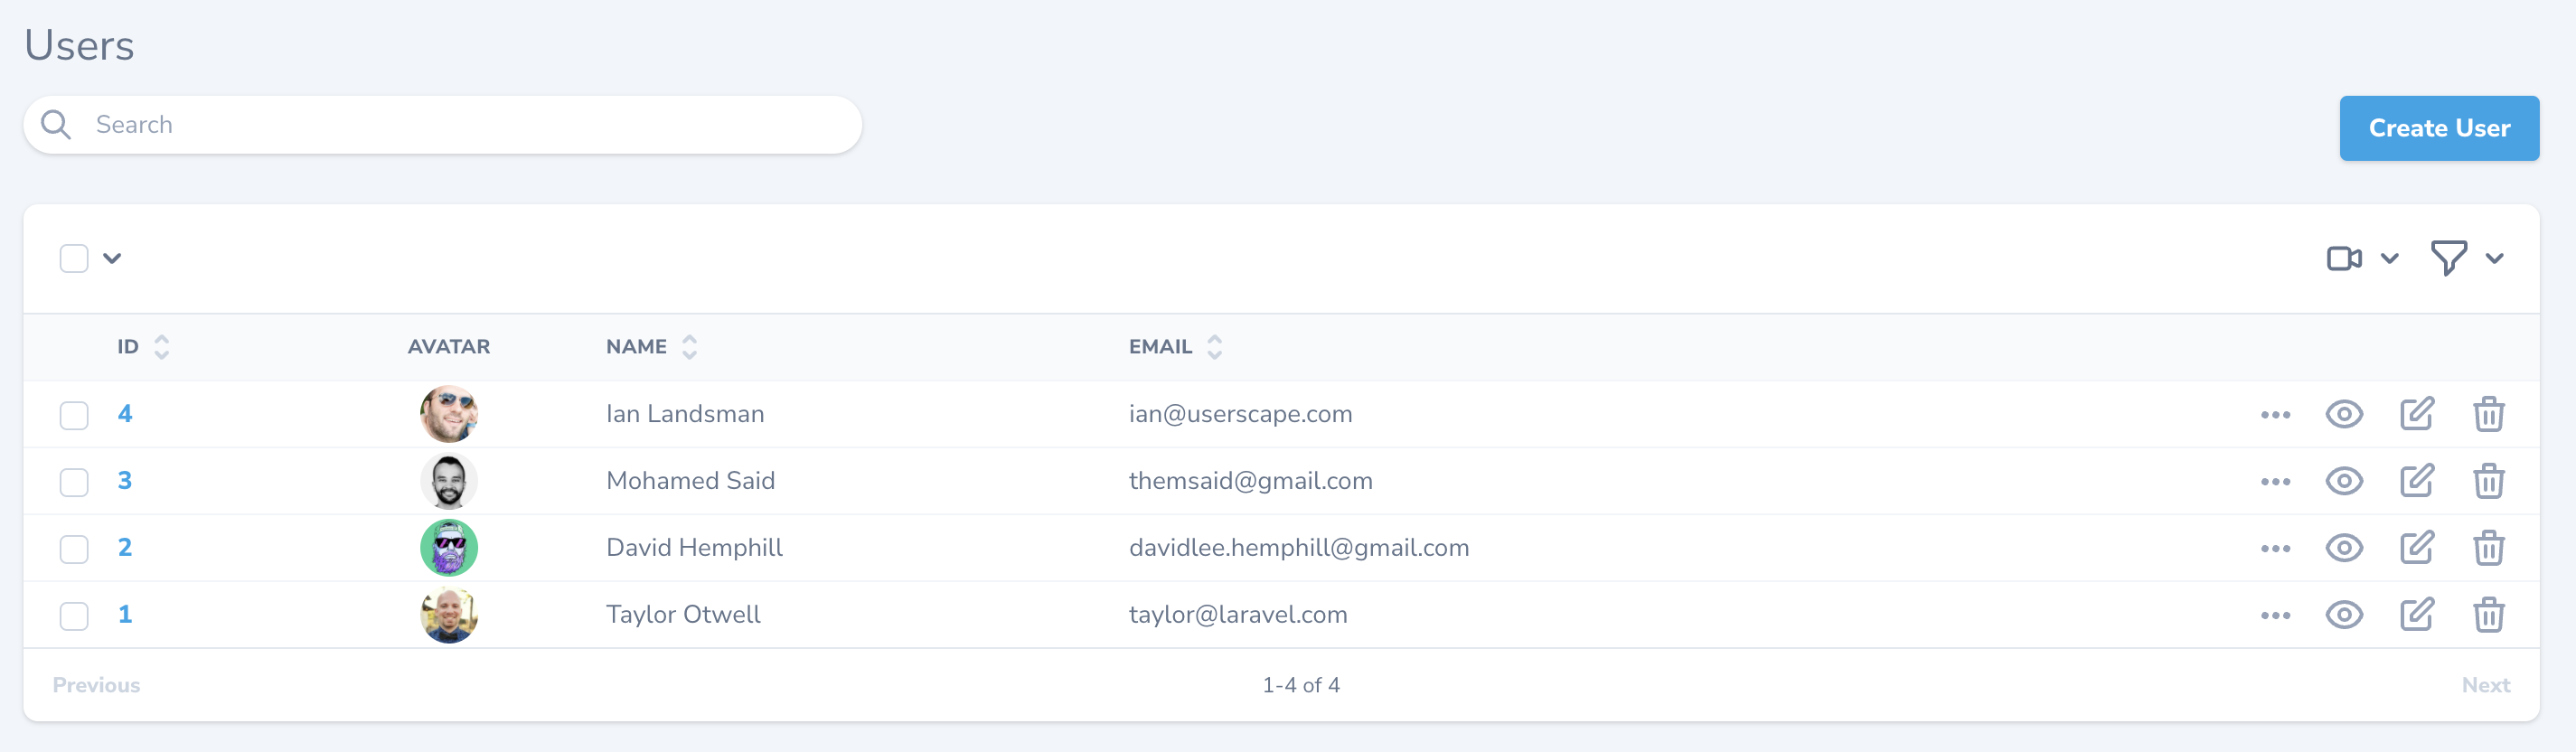
This will display your table rows with less visual height, enabling more data to be shown:
If you do not want a resource to appear in the sidebar, you may override the `displayInNavigation` property of your resource class:
```php theme={null}
/**
* Indicates if the resource should be displayed in the sidebar.
*
* @var bool
*/
public static $displayInNavigation = false;
```
#### Customizing Resource Menus
You can customize the resource's menu by defining a `menu` method on your resource class:
```php theme={null}
use Illuminate\Http\Request;
/**
* Get the menu that should represent the resource.
*
* @param \Illuminate\Http\Request $request
* @return \Laravel\Nova\Menu\MenuItem
*/
public function menu(Request $request)
{
return parent::menu($request)->withBadge(function () {
return static::$model::count();
});
}
```
Please refer to the documentation on [menu customization](./../customization/menus) for more information.
## Grouping Resources
If you would like to separate resources into different sidebar groups, you may override the `group` property of your resource class:
```php theme={null}
/**
* The logical group associated with the resource.
*
* @var string
*/
public static $group = 'Admin';
```
## Resource Table Style Customization
Nova supports a few visual customization options for your resources.
### Table Styles
Sometimes it's convenient to show more data on your resource index tables. To accomplish this, you can use the "tight" table style option designed to increase the visual density of your table rows. To accomplish this, override the static `$tableStyle` property or the static `tableStyle` method on your resource class:
```php theme={null}
/**
* The visual style used for the table. Available options are 'tight' and 'default'.
*
* @var string
*/
public static $tableStyle = 'tight';
```
This will display your table rows with less visual height, enabling more data to be shown:
 ### Column Borders
You can instruct Nova to display column borders by overriding the static `$showColumnBorders` property or the static `showColumnBorders` method on your resource class:
```php theme={null}
/**
* Whether to show borders for each column on the X-axis.
*
* @var bool
*/
public static $showColumnBorders = true;
```
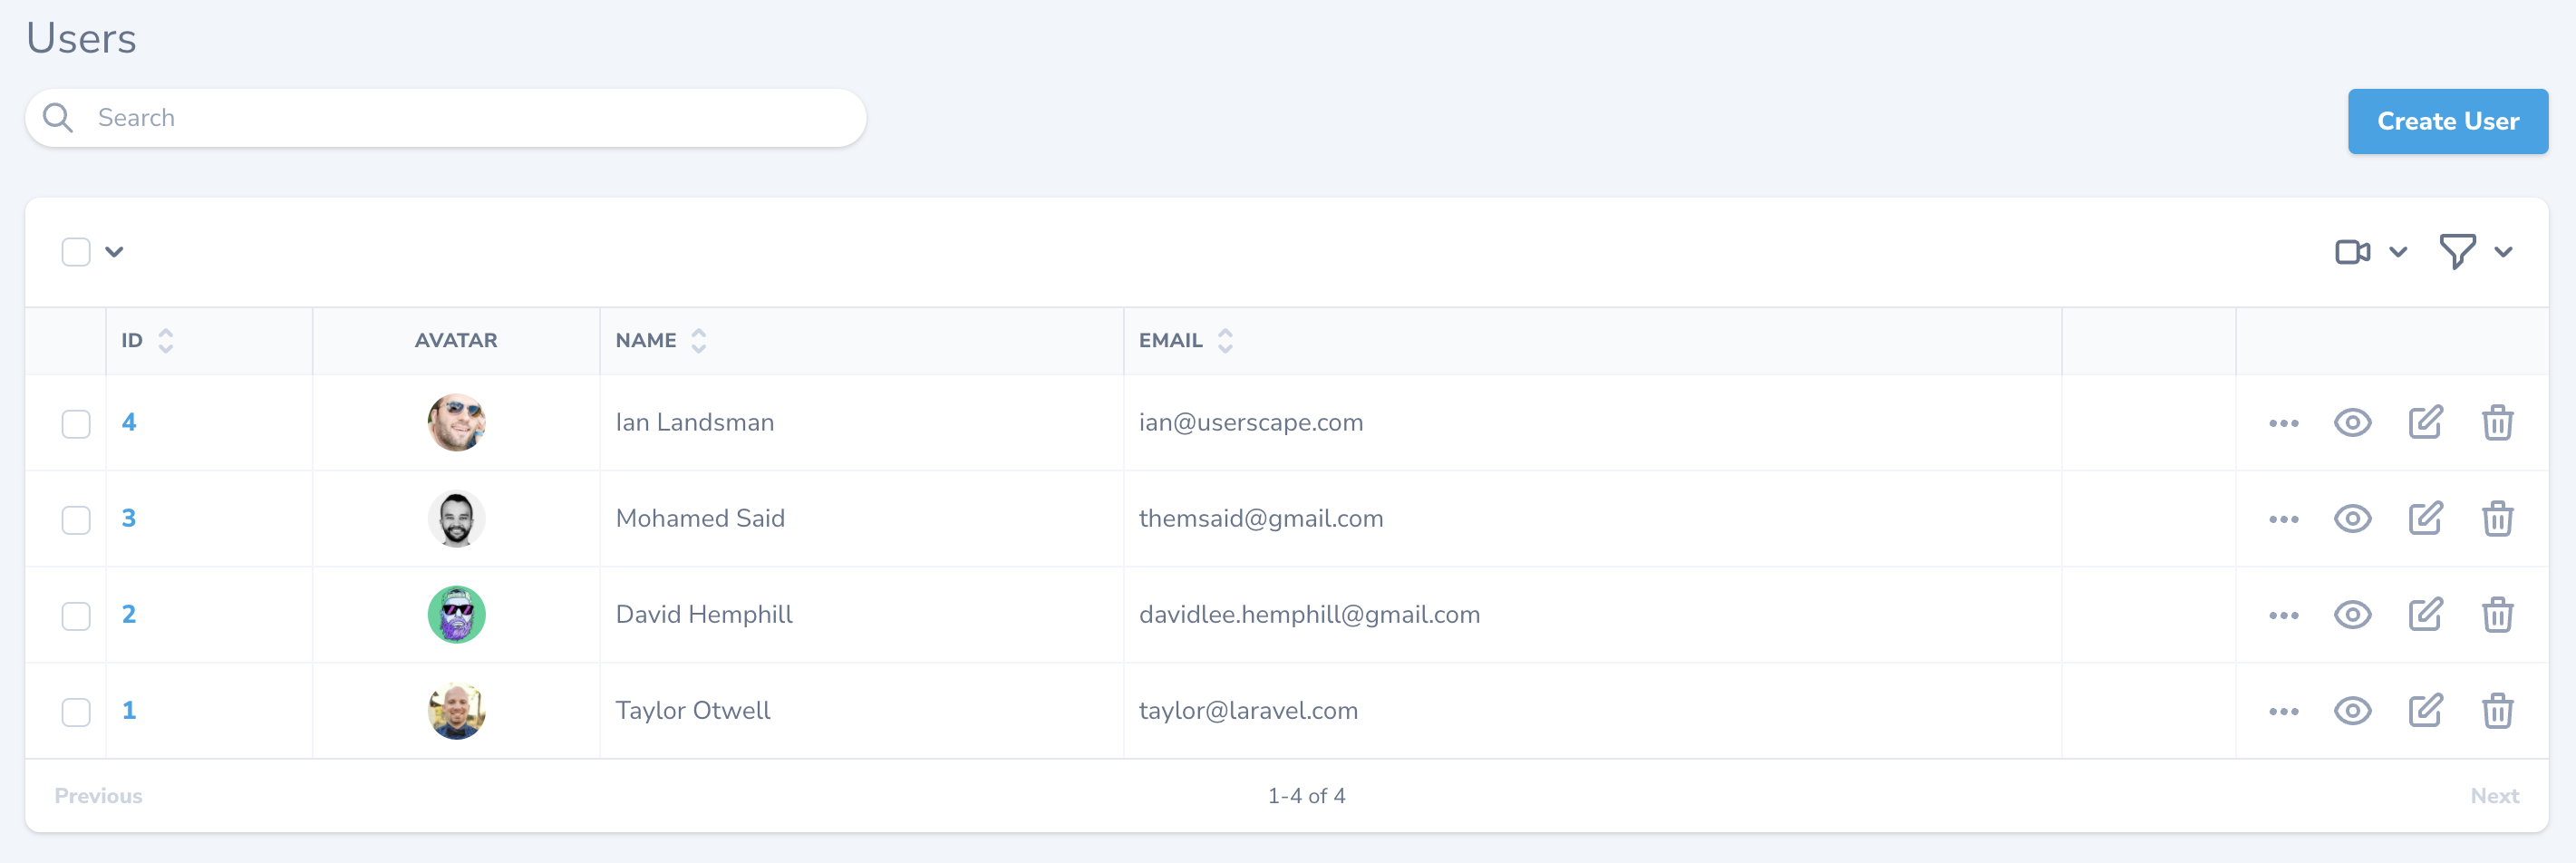
Setting this property to `true` will instruct Nova to display the table with borders on every table item:
### Column Borders
You can instruct Nova to display column borders by overriding the static `$showColumnBorders` property or the static `showColumnBorders` method on your resource class:
```php theme={null}
/**
* Whether to show borders for each column on the X-axis.
*
* @var bool
*/
public static $showColumnBorders = true;
```
Setting this property to `true` will instruct Nova to display the table with borders on every table item:
 ## Resource Table Click Action
By default, when clicking on a resource table row, Nova will navigate to the detail view for the resource. However, you may want Nova to navigate to the edit form instead. You can customize this behavior by changing the `clickAction` property on the resource's class:
```php theme={null}
/**
* The click action to use when clicking on the resource in the table.
*
* Can be one of: 'detail' (default), 'edit', 'select', 'preview', or 'ignore'.
*
* @var string
*/
public static $clickAction = 'edit';
```
Choosing the `select` option will select the resource row's checkbox. The `ignore` option instructs Nova to ignore click events altogether.
## Eager Loading
If you routinely need to access a resource's relationships within your fields, [resource title](./../search/global-search#title-subtitle-attributes), or [resource subtitle](./../search/global-search#title-subtitle-attributes), it may be a good idea to add the relationship to the `with` property of your resource. This property instructs Nova to always eager load the listed relationships when retrieving the resource.
For example, if you access a `Post` resource's `user` relationship within the `Post` resource's `subtitle` method, you should add the `user` relationship to the `Post` resource's `with` property:
```php theme={null}
/**
* The relationships that should be eager loaded on index queries.
*
* @var array
*/
public static $with = ['user'];
```
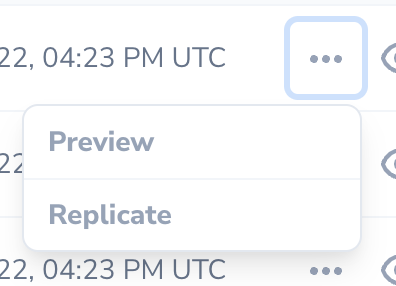
## Resource Replication
Sometimes, you may want to create a new resource while using all of the data from an existing resource as a starting point. Nova's resource replication feature does just that. After clicking the replicate button, you'll be whisked away to a resource creation form with all of the replicated resource's data hydrated into the form and ready for tweaking:
## Resource Table Click Action
By default, when clicking on a resource table row, Nova will navigate to the detail view for the resource. However, you may want Nova to navigate to the edit form instead. You can customize this behavior by changing the `clickAction` property on the resource's class:
```php theme={null}
/**
* The click action to use when clicking on the resource in the table.
*
* Can be one of: 'detail' (default), 'edit', 'select', 'preview', or 'ignore'.
*
* @var string
*/
public static $clickAction = 'edit';
```
Choosing the `select` option will select the resource row's checkbox. The `ignore` option instructs Nova to ignore click events altogether.
## Eager Loading
If you routinely need to access a resource's relationships within your fields, [resource title](./../search/global-search#title-subtitle-attributes), or [resource subtitle](./../search/global-search#title-subtitle-attributes), it may be a good idea to add the relationship to the `with` property of your resource. This property instructs Nova to always eager load the listed relationships when retrieving the resource.
For example, if you access a `Post` resource's `user` relationship within the `Post` resource's `subtitle` method, you should add the `user` relationship to the `Post` resource's `with` property:
```php theme={null}
/**
* The relationships that should be eager loaded on index queries.
*
* @var array
*/
public static $with = ['user'];
```
## Resource Replication
Sometimes, you may want to create a new resource while using all of the data from an existing resource as a starting point. Nova's resource replication feature does just that. After clicking the replicate button, you'll be whisked away to a resource creation form with all of the replicated resource's data hydrated into the form and ready for tweaking:
 To customize the replication model, you can override the `replicate` method on the resource class:
```php theme={null}
/**
* Return a replicated resource.
*
* @return static
*
* @throws \InvalidArgumentException
*/
public function replicate()
{
return tap(parent::replicate(), function ($resource) {
$model = $resource->model();
$model->name = 'Duplicate of '.$model->name;
});
}
```
`Markdown` and `Trix` fields that use the `withFiles` method may not be replicated.
If you need to store a reference to the original resource's ID, you may access the `fromResourceId` value on the replication request. Typically, this value would be accessed from an event listener or observer that is listening for the model's `creating` event:
```php theme={null}
namespace App\Observers;
use App\Models\Post;
use Laravel\Nova\Http\Requests\NovaRequest;
use Laravel\Nova\Nova;
class PostObserver
{
/**
* Handle the creation of a new Post.
*
* @param \App\Models\Post $model
* @return void
*/
public function creating(Post $model): void
{
Nova::whenServing(function (NovaRequest $request) use ($model) {
$model->parent_id = $request->input('fromResourceId');
});
}
}
```
## Resource Events
All Nova operations use the typical `save`, `delete`, `forceDelete`, `restore` Eloquent methods you are familiar with. Therefore, it is easy to listen for model events triggered by Nova and react to them. The easiest approach is to simply attach a Laravel [model observer](https://laravel.com/docs/eloquent#observers) to a model:
```php theme={null}
namespace App\Providers;
use App\Models\User;
use App\Observers\UserObserver;
use Illuminate\Support\ServiceProvider;
class AppServiceProvider extends ServiceProvider
{
/**
* Bootstrap any application services.
*
* @return void
*/
public function boot()
{
parent::boot();
User::observe(UserObserver::class);
}
/**
* Register the service provider.
*
* @return void
*/
public function register()
{
//
}
}
```
If you would like to attach an observer whose methods are invoked **only during** Nova related HTTP requests, you may register observers using the `make` method provided by the `Laravel\Nova\Observable` class. Typically, this should be done within your application's `NovaServiceProvider`:
```php theme={null}
use App\Models\User;
use Laravel\Nova\Observable;
use App\Observers\UserObserver;
/**
* Bootstrap any application services.
*
* @return void
*/
public function boot()
{
parent::boot();
Observable::make(User::class, UserObserver::class);
}
```
Alternatively, you can determine if the current HTTP request is serving a Nova related request within the `Observer` itself using Nova's `whenServing` method:
```php theme={null}
namespace App\Observers;
use App\Models\User;
use Illuminate\Http\Request;
use Laravel\Nova\Http\Requests\NovaRequest;
use Laravel\Nova\Nova;
class UserObserver
{
/**
* Handle the User "created" event.
*
* @param \App\Models\User $user
* @return void
*/
public function created(User $user)
{
Nova::whenServing(function (NovaRequest $request) use ($user) {
// Only invoked during Nova requests...
}, function (Request $request) use ($user) {
// Invoked for non-Nova requests...
});
// Always invoked...
}
}
```
### Resource Hooks
Nova also allows you to define the following static methods on a resource to serve as hooks that are only invoked when the corresponding resource action is executed from within Laravel Nova:
* `afterCreate`
* `afterUpdate`
* `afterDelete`
* `afterForceDelete`
* `afterRestore`
For example, you may want to send an email verification notification after a user has been created within Nova:
```php theme={null}
use App\Models\User;
use App\Nova\Resource;
use Illuminate\Database\Eloquent\Model;
use Laravel\Nova\Http\Requests\NovaRequest;
class User extends Resource
{
/**
* Register a callback to be called after the resource is created.
*
* @param \Laravel\Nova\Http\Requests\NovaRequest $request
* @param \Illuminate\Database\Eloquent\Model $model
* @return void
*/
public static function afterCreate(NovaRequest $request, Model $model)
{
$model->sendEmailVerificationNotification();
}
}
```
## Preventing Conflicts
If a model has been updated since it was last retrieved by Nova, Nova will automatically respond with a `409 Conflict` HTTP status code and display an error message to prevent unintentional model changes. This may occur if another user updates the model after you have opened the "Edit" page on the resource. This feature is also known as the Nova "Traffic Cop".
### Disabling Traffic Cop
If you are not concerned with preventing conflicts, you can disable the Traffic Cop feature by setting the `trafficCop` property to `false` on a given resource class:
```php theme={null}
/**
* Indicates whether Nova should check for modifications between viewing and updating a resource.
*
* @var bool
*/
public static $trafficCop = false;
```
You may also override the `trafficCop` method on the resource if you have more intense customization needs in order to determine if this feature should be enabled:
```php theme={null}
/**
* Indicates whether Nova should check for modifications between viewing and updating a resource.
*
* @param \Illuminate\Http\Request $request
* @return bool
*/
public static function trafficCop(Request $request)
{
return static::$trafficCop;
}
```
If you are experiencing issues with traffic cop you should ensure that your system time is correctly synchronized using NTP.
## Resource Polling
Nova can automatically fetch the latest records for a resource at a specified interval. To enable polling, override the `polling` property of your Resource class:
```php theme={null}
/**
* Indicates whether the resource should automatically poll for new resources.
*
* @var bool
*/
public static $polling = true;
```
To customize the polling interval, you may override the `pollingInterval` property on your resource class with the number of seconds Nova should wait before fetching new resource records:
```php theme={null}
/**
* The interval at which Nova should poll for new resources.
*
* @var int
*/
public static $pollingInterval = 5;
```
## Toggling Resource Polling
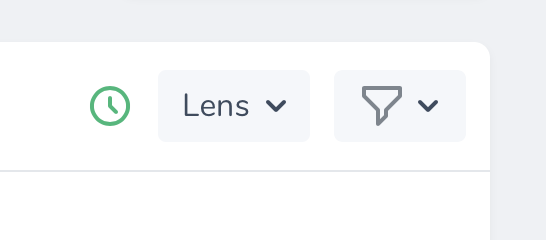
By default, when resource polling is enabled, there is no way to disable it once the page loads. You can instruct Nova to display a start / stop toggle button for resource polling by setting the `showPollingToggle` property on your resource class to `true`:
```php theme={null}
/**
* Indicates whether to show the polling toggle button inside Nova.
*
* @var bool
*/
public static $showPollingToggle = true;
```
Nova will then display a clickable button that you may use to enable / disable polling for the resource:
To customize the replication model, you can override the `replicate` method on the resource class:
```php theme={null}
/**
* Return a replicated resource.
*
* @return static
*
* @throws \InvalidArgumentException
*/
public function replicate()
{
return tap(parent::replicate(), function ($resource) {
$model = $resource->model();
$model->name = 'Duplicate of '.$model->name;
});
}
```
`Markdown` and `Trix` fields that use the `withFiles` method may not be replicated.
If you need to store a reference to the original resource's ID, you may access the `fromResourceId` value on the replication request. Typically, this value would be accessed from an event listener or observer that is listening for the model's `creating` event:
```php theme={null}
namespace App\Observers;
use App\Models\Post;
use Laravel\Nova\Http\Requests\NovaRequest;
use Laravel\Nova\Nova;
class PostObserver
{
/**
* Handle the creation of a new Post.
*
* @param \App\Models\Post $model
* @return void
*/
public function creating(Post $model): void
{
Nova::whenServing(function (NovaRequest $request) use ($model) {
$model->parent_id = $request->input('fromResourceId');
});
}
}
```
## Resource Events
All Nova operations use the typical `save`, `delete`, `forceDelete`, `restore` Eloquent methods you are familiar with. Therefore, it is easy to listen for model events triggered by Nova and react to them. The easiest approach is to simply attach a Laravel [model observer](https://laravel.com/docs/eloquent#observers) to a model:
```php theme={null}
namespace App\Providers;
use App\Models\User;
use App\Observers\UserObserver;
use Illuminate\Support\ServiceProvider;
class AppServiceProvider extends ServiceProvider
{
/**
* Bootstrap any application services.
*
* @return void
*/
public function boot()
{
parent::boot();
User::observe(UserObserver::class);
}
/**
* Register the service provider.
*
* @return void
*/
public function register()
{
//
}
}
```
If you would like to attach an observer whose methods are invoked **only during** Nova related HTTP requests, you may register observers using the `make` method provided by the `Laravel\Nova\Observable` class. Typically, this should be done within your application's `NovaServiceProvider`:
```php theme={null}
use App\Models\User;
use Laravel\Nova\Observable;
use App\Observers\UserObserver;
/**
* Bootstrap any application services.
*
* @return void
*/
public function boot()
{
parent::boot();
Observable::make(User::class, UserObserver::class);
}
```
Alternatively, you can determine if the current HTTP request is serving a Nova related request within the `Observer` itself using Nova's `whenServing` method:
```php theme={null}
namespace App\Observers;
use App\Models\User;
use Illuminate\Http\Request;
use Laravel\Nova\Http\Requests\NovaRequest;
use Laravel\Nova\Nova;
class UserObserver
{
/**
* Handle the User "created" event.
*
* @param \App\Models\User $user
* @return void
*/
public function created(User $user)
{
Nova::whenServing(function (NovaRequest $request) use ($user) {
// Only invoked during Nova requests...
}, function (Request $request) use ($user) {
// Invoked for non-Nova requests...
});
// Always invoked...
}
}
```
### Resource Hooks
Nova also allows you to define the following static methods on a resource to serve as hooks that are only invoked when the corresponding resource action is executed from within Laravel Nova:
* `afterCreate`
* `afterUpdate`
* `afterDelete`
* `afterForceDelete`
* `afterRestore`
For example, you may want to send an email verification notification after a user has been created within Nova:
```php theme={null}
use App\Models\User;
use App\Nova\Resource;
use Illuminate\Database\Eloquent\Model;
use Laravel\Nova\Http\Requests\NovaRequest;
class User extends Resource
{
/**
* Register a callback to be called after the resource is created.
*
* @param \Laravel\Nova\Http\Requests\NovaRequest $request
* @param \Illuminate\Database\Eloquent\Model $model
* @return void
*/
public static function afterCreate(NovaRequest $request, Model $model)
{
$model->sendEmailVerificationNotification();
}
}
```
## Preventing Conflicts
If a model has been updated since it was last retrieved by Nova, Nova will automatically respond with a `409 Conflict` HTTP status code and display an error message to prevent unintentional model changes. This may occur if another user updates the model after you have opened the "Edit" page on the resource. This feature is also known as the Nova "Traffic Cop".
### Disabling Traffic Cop
If you are not concerned with preventing conflicts, you can disable the Traffic Cop feature by setting the `trafficCop` property to `false` on a given resource class:
```php theme={null}
/**
* Indicates whether Nova should check for modifications between viewing and updating a resource.
*
* @var bool
*/
public static $trafficCop = false;
```
You may also override the `trafficCop` method on the resource if you have more intense customization needs in order to determine if this feature should be enabled:
```php theme={null}
/**
* Indicates whether Nova should check for modifications between viewing and updating a resource.
*
* @param \Illuminate\Http\Request $request
* @return bool
*/
public static function trafficCop(Request $request)
{
return static::$trafficCop;
}
```
If you are experiencing issues with traffic cop you should ensure that your system time is correctly synchronized using NTP.
## Resource Polling
Nova can automatically fetch the latest records for a resource at a specified interval. To enable polling, override the `polling` property of your Resource class:
```php theme={null}
/**
* Indicates whether the resource should automatically poll for new resources.
*
* @var bool
*/
public static $polling = true;
```
To customize the polling interval, you may override the `pollingInterval` property on your resource class with the number of seconds Nova should wait before fetching new resource records:
```php theme={null}
/**
* The interval at which Nova should poll for new resources.
*
* @var int
*/
public static $pollingInterval = 5;
```
## Toggling Resource Polling
By default, when resource polling is enabled, there is no way to disable it once the page loads. You can instruct Nova to display a start / stop toggle button for resource polling by setting the `showPollingToggle` property on your resource class to `true`:
```php theme={null}
/**
* Indicates whether to show the polling toggle button inside Nova.
*
* @var bool
*/
public static $showPollingToggle = true;
```
Nova will then display a clickable button that you may use to enable / disable polling for the resource:
 ## Redirection
Nova allows you to easily customize where a user is redirected after performing resource actions such as creating or updating a resource:
* [redirectAfterCreate()](#after-creating-redirection)
* [redirectAfterUpdate()](#after-updating-redirection)
* [redirectAfterDelete()](#after-deletion-redirection)
Behind the scenes, Nova's redirect features use Inertia.js's `visit` method. Because of this, redirection is limited to paths within Laravel Nova. You may invoke the `URL::remote` method to redirect to an external URL:
```php theme={null}
use Laravel\Nova\URL;
return URL::remote('https://nova.laravel.com');
```
#### After Creating Redirection
You may customize where a user is redirected after creating a resource using by overriding your resource's `redirectAfterCreate` method:
```php theme={null}
/**
* Return the location to redirect the user after creation.
*
* @param \Laravel\Nova\Http\Requests\NovaRequest $request
* @param \Laravel\Nova\Resource $resource
* @return \Laravel\Nova\URL|string
*/
public static function redirectAfterCreate(NovaRequest $request, $resource)
{
return '/resources/'.static::uriKey().'/'.$resource->getKey();
}
```
#### After Updating Redirection
You may customize where a user is redirected after updating a resource using by overriding your resource's `redirectAfterUpdate` method:
```php theme={null}
/**
* Return the location to redirect the user after update.
*
* @param \Laravel\Nova\Http\Requests\NovaRequest $request
* @param \Laravel\Nova\Resource $resource
* @return \Laravel\Nova\URL|string
*/
public static function redirectAfterUpdate(NovaRequest $request, $resource)
{
return '/resources/'.static::uriKey().'/'.$resource->getKey();
}
```
#### After Deletion Redirection
You may customize where a user is redirected after deleting a resource using by overriding your resource's `redirectAfterDelete` method:
```php theme={null}
/**
* Return the location to redirect the user after deletion.
*
* @param \Laravel\Nova\Http\Requests\NovaRequest $request
* @return \Laravel\Nova\URL|string|null
*/
public static function redirectAfterDelete(NovaRequest $request)
{
return null;
}
```
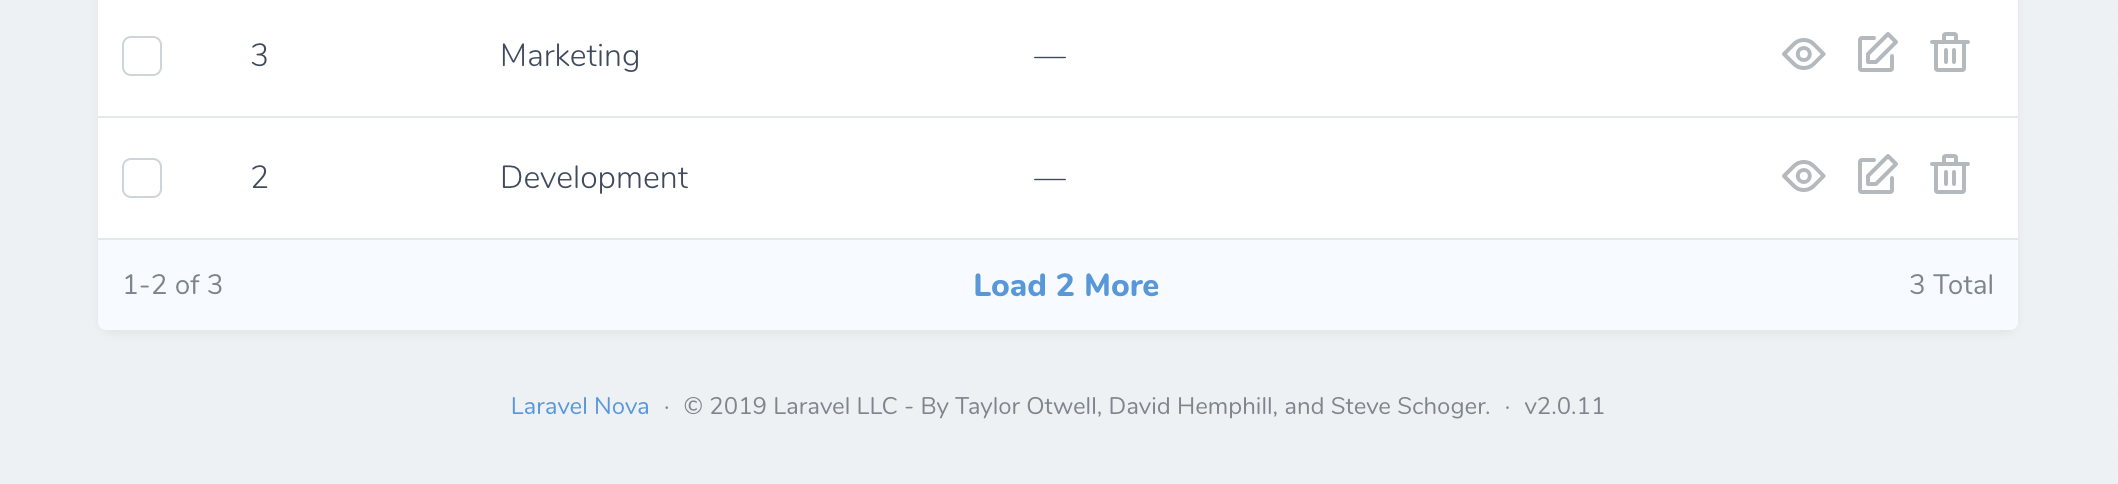
## Pagination
Nova has the ability to show pagination links for your Resource listings. You can choose between three different styles: "simple", "load-more", and "links", depending on your application's needs:
## Redirection
Nova allows you to easily customize where a user is redirected after performing resource actions such as creating or updating a resource:
* [redirectAfterCreate()](#after-creating-redirection)
* [redirectAfterUpdate()](#after-updating-redirection)
* [redirectAfterDelete()](#after-deletion-redirection)
Behind the scenes, Nova's redirect features use Inertia.js's `visit` method. Because of this, redirection is limited to paths within Laravel Nova. You may invoke the `URL::remote` method to redirect to an external URL:
```php theme={null}
use Laravel\Nova\URL;
return URL::remote('https://nova.laravel.com');
```
#### After Creating Redirection
You may customize where a user is redirected after creating a resource using by overriding your resource's `redirectAfterCreate` method:
```php theme={null}
/**
* Return the location to redirect the user after creation.
*
* @param \Laravel\Nova\Http\Requests\NovaRequest $request
* @param \Laravel\Nova\Resource $resource
* @return \Laravel\Nova\URL|string
*/
public static function redirectAfterCreate(NovaRequest $request, $resource)
{
return '/resources/'.static::uriKey().'/'.$resource->getKey();
}
```
#### After Updating Redirection
You may customize where a user is redirected after updating a resource using by overriding your resource's `redirectAfterUpdate` method:
```php theme={null}
/**
* Return the location to redirect the user after update.
*
* @param \Laravel\Nova\Http\Requests\NovaRequest $request
* @param \Laravel\Nova\Resource $resource
* @return \Laravel\Nova\URL|string
*/
public static function redirectAfterUpdate(NovaRequest $request, $resource)
{
return '/resources/'.static::uriKey().'/'.$resource->getKey();
}
```
#### After Deletion Redirection
You may customize where a user is redirected after deleting a resource using by overriding your resource's `redirectAfterDelete` method:
```php theme={null}
/**
* Return the location to redirect the user after deletion.
*
* @param \Laravel\Nova\Http\Requests\NovaRequest $request
* @return \Laravel\Nova\URL|string|null
*/
public static function redirectAfterDelete(NovaRequest $request)
{
return null;
}
```
## Pagination
Nova has the ability to show pagination links for your Resource listings. You can choose between three different styles: "simple", "load-more", and "links", depending on your application's needs:

 By default, Nova Resources are displayed using the "simple" style. However, you may customize this to use either the `load-more` or `links` styles by changing the value of the `pagination` configuration option within your application's `config/nova.php` configuration file:
```php theme={null}
'pagination' => 'links',
```
### Customizing Pagination
If you would like to customize the selectable maximum result amounts shown on each resource's "per page" filter menu, you can do so by customizing the resource's `perPageOptions` property:
```php theme={null}
/**
* The pagination per-page options configured for this resource.
*
* @return array
*/
public static $perPageOptions = [50, 100, 150];
```
Alternatively, you can override the `perPageOptions` method on your application's base `Resource` class, which is created when you install Nova:
```php theme={null}
/**
* The pagination per-page options configured for this resource.
*
* @return array
*/
public static function perPageOptions()
{
return [50, 100, 150];
}
```
Changing the value of `perPageOptions` on your `Resource` will cause Nova to fetch the number of resources equal to the first value in the `perPageOptions` array.
Using the `$perPageViaRelationship` property, you may also customize the number of resources displayed when a particular resource is displayed on another resource's detail view as a relationship:
```php theme={null}
/**
* The number of resources to show per page via relationships.
*
* @var int
*/
public static $perPageViaRelationship = 10;
```
## CSV Export
Occasionally you may need to export a group of resource records as a CSV file so that you can interact with the data in a spreadsheet application or import the data into another system. Thankfully, Nova includes built-in support for exporting resource data.
To get started, add the `Laravel\Nova\Actions\ExportAsCsv` [action](./../actions/registering-actions) to your Nova resource:
```php theme={null}
use Laravel\Nova\Actions\ExportAsCsv;
use Laravel\Nova\Http\Requests\NovaRequest;
/**
* Get the actions available for the resource.
*
* @param \Laravel\Nova\Http\Requests\NovaRequest $request
* @return array
*/
public function actions(NovaRequest $request)
{
return [
ExportAsCsv::make(),
];
}
```
If you would like to allow the user to name the CSV file that is downloaded, you may invoke the `nameable` method when registering the action:
```php theme={null}
return [
ExportAsCsv::make()->nameable(),
];
```
If you would like to customize and format the fields that are included in the generated CSV, you may invoke the `withFormat` method when registering the action:
```php theme={null}
return [
ExportAsCsv::make()->withFormat(function ($model) {
return [
'ID' => $model->getKey(),
'Name' => $model->name,
'Email Address' => $model->email,
];
}),
];
```
## Resource Index Search Debounce
You may wish to customize the search debounce timing of an individual resource's index listing. For example, the queries executed to retrieve some resources may take longer than others. You can customize an individual resource's search debounce by setting the `debounce` property on the resource class:
```php theme={null}
/**
* The debounce amount (in seconds) to use when searching this resource.
*
* @var float
*/
public static $debounce = 0.5; // 0.5 seconds
```
## Keyboard Shortcuts
You may press the `C` key on a resource index to navigate to the "Create Resource" page. On the resource detail page, the `E` key may be used to navigate to the "Update Resource" page.
By default, Nova Resources are displayed using the "simple" style. However, you may customize this to use either the `load-more` or `links` styles by changing the value of the `pagination` configuration option within your application's `config/nova.php` configuration file:
```php theme={null}
'pagination' => 'links',
```
### Customizing Pagination
If you would like to customize the selectable maximum result amounts shown on each resource's "per page" filter menu, you can do so by customizing the resource's `perPageOptions` property:
```php theme={null}
/**
* The pagination per-page options configured for this resource.
*
* @return array
*/
public static $perPageOptions = [50, 100, 150];
```
Alternatively, you can override the `perPageOptions` method on your application's base `Resource` class, which is created when you install Nova:
```php theme={null}
/**
* The pagination per-page options configured for this resource.
*
* @return array
*/
public static function perPageOptions()
{
return [50, 100, 150];
}
```
Changing the value of `perPageOptions` on your `Resource` will cause Nova to fetch the number of resources equal to the first value in the `perPageOptions` array.
Using the `$perPageViaRelationship` property, you may also customize the number of resources displayed when a particular resource is displayed on another resource's detail view as a relationship:
```php theme={null}
/**
* The number of resources to show per page via relationships.
*
* @var int
*/
public static $perPageViaRelationship = 10;
```
## CSV Export
Occasionally you may need to export a group of resource records as a CSV file so that you can interact with the data in a spreadsheet application or import the data into another system. Thankfully, Nova includes built-in support for exporting resource data.
To get started, add the `Laravel\Nova\Actions\ExportAsCsv` [action](./../actions/registering-actions) to your Nova resource:
```php theme={null}
use Laravel\Nova\Actions\ExportAsCsv;
use Laravel\Nova\Http\Requests\NovaRequest;
/**
* Get the actions available for the resource.
*
* @param \Laravel\Nova\Http\Requests\NovaRequest $request
* @return array
*/
public function actions(NovaRequest $request)
{
return [
ExportAsCsv::make(),
];
}
```
If you would like to allow the user to name the CSV file that is downloaded, you may invoke the `nameable` method when registering the action:
```php theme={null}
return [
ExportAsCsv::make()->nameable(),
];
```
If you would like to customize and format the fields that are included in the generated CSV, you may invoke the `withFormat` method when registering the action:
```php theme={null}
return [
ExportAsCsv::make()->withFormat(function ($model) {
return [
'ID' => $model->getKey(),
'Name' => $model->name,
'Email Address' => $model->email,
];
}),
];
```
## Resource Index Search Debounce
You may wish to customize the search debounce timing of an individual resource's index listing. For example, the queries executed to retrieve some resources may take longer than others. You can customize an individual resource's search debounce by setting the `debounce` property on the resource class:
```php theme={null}
/**
* The debounce amount (in seconds) to use when searching this resource.
*
* @var float
*/
public static $debounce = 0.5; // 0.5 seconds
```
## Keyboard Shortcuts
You may press the `C` key on a resource index to navigate to the "Create Resource" page. On the resource detail page, the `E` key may be used to navigate to the "Update Resource" page.